Here's a way to fashion your own custom pruning saw for less money.
For carving spoons, I really like to find gracefully curving limbs; fruitwood or hardwoods are good trees, anything that produces berries or nuts. Once I find a good curve, I prefer to saw off the limb from a living tree with a sharp pruning saw. Green wood is much easier to carve with hand tools. I have used folding pruning saws for years for this purpose, many of which have tempered blades that do not allow them to be resharpened.
Most of these saws can be quite expensive.
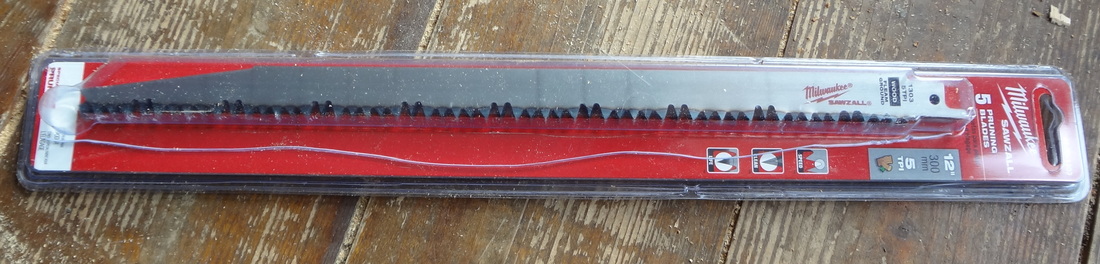
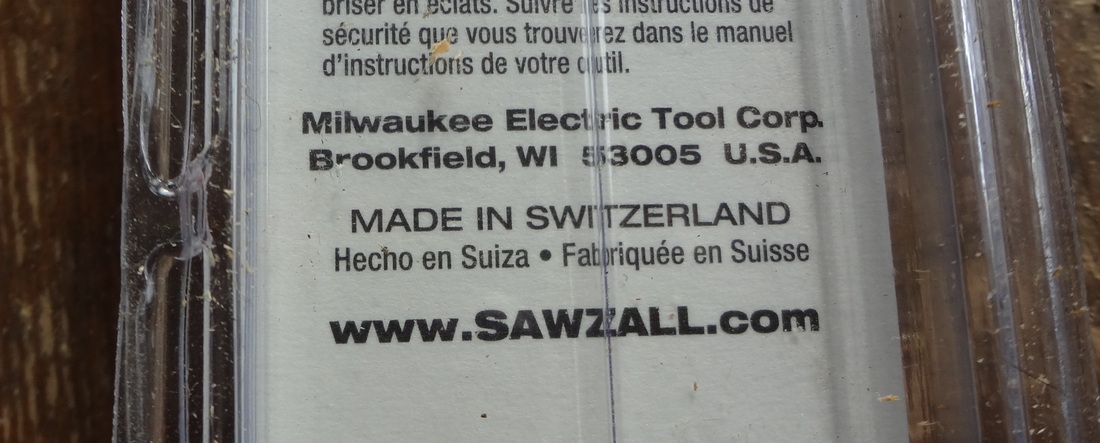
When I first saw a package of blades designed to fit into a reciprocating "Sawzall" type of power tool, I didn't think much of them. My friend Andrew pointed out to me that the blades were made in Switzerland though, and so I gave them a closer look. I wondered if the Swiss saw steel might possibly be as good as my other Swiss tool steel and therefore as good as my expensive Japanese folding pruning saws.
It turns out they are comparable quality steel for a lot less money.
These saw blades I purchased came in a package of five and cost about twenty dollars at the local hardware store.
So with a little work you can make your own pruning saw and have some spare blades to share with friends or keep for when your saw gets damaged or dull from use.
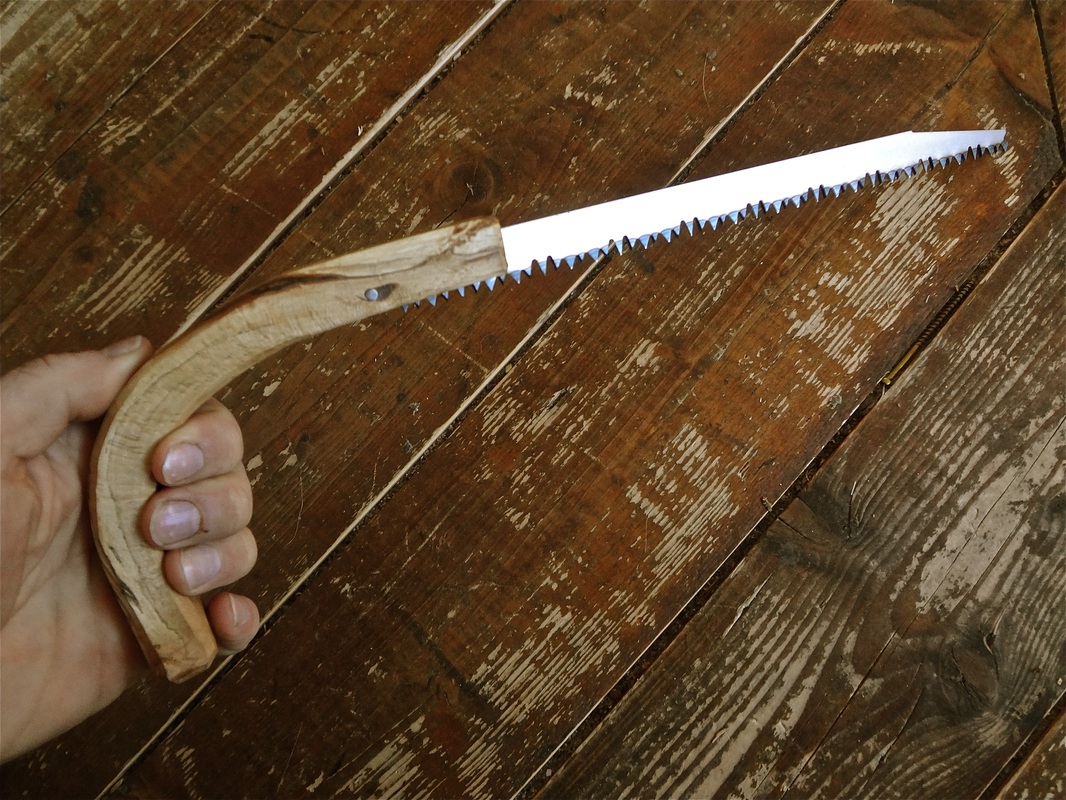
The first step is to find an appropriate piece of wood for your handle. I chose a crook because I like having a saw with a curved handle, so my wrist stays in alignment as I work the saw.
I think any dry hardwood would be a fine choice (note that this is different from the green wood used for spoon carving).
To give the blade enough support, I suggest that it should be at least 3/4" square at the part that will accept the saw blade.
I laid the blade on the handle blank and traced the profile with a pencil. Don't forget to trace the little hole as well. I adjusted the blade so that it was closer to the bottom edge of the handle blank. This leaves most of the wood for the handle on the top side of the blade where it will need the most support while sawing.
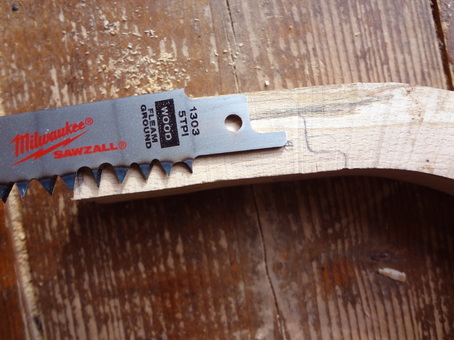 The saw blade on top of the handle blank with pencil tracing of the profile and hole location.
 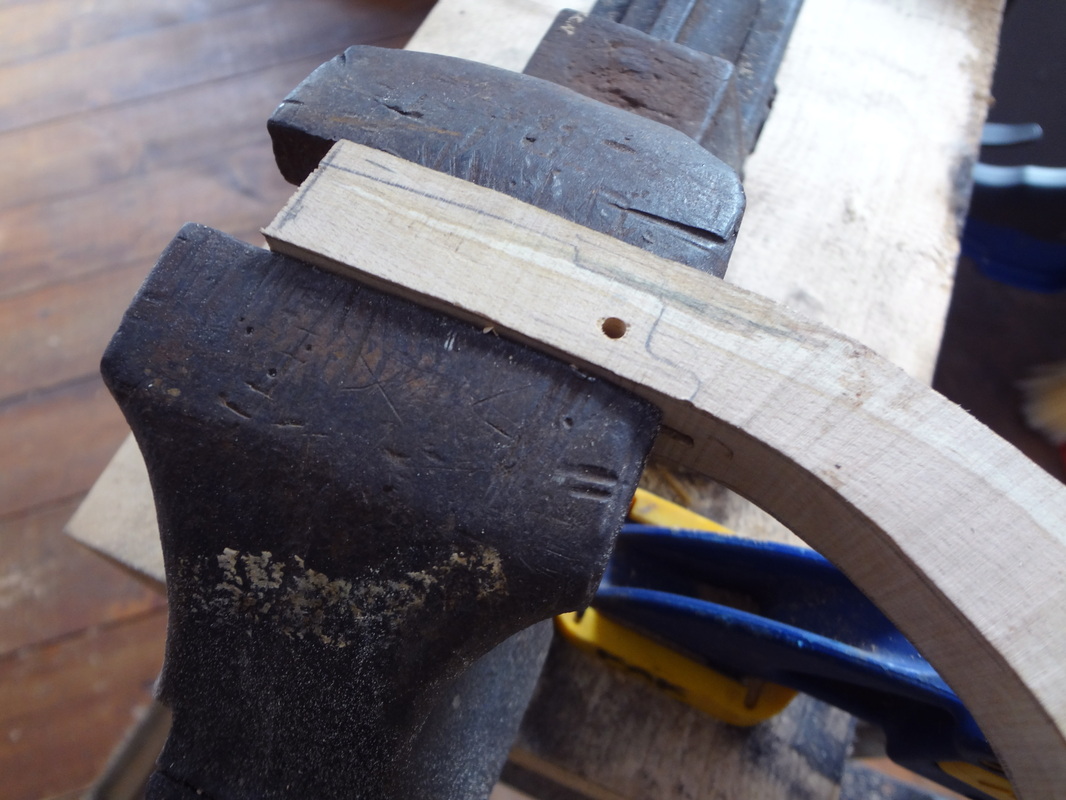 Saw handle in vise with hole and pencil tracing. | Next, I drilled a tight fitting hole to accept a framing nail in the wooden handle blank. Before drilling your hole in the handle blank, make sure your nail just fits the hole in the blade; there should be very little extra room. It is very hard to drill the hole larger in the saw blade, so finding a nail that fits the hole is helpful. In addition to drilling a hole in the wooden handle blank, you must also saw a slot for the blade to fit into. I found the pruning saw blade itself made too large a kerf to hold the blade tightly, so I used a small gents saw that made a kerf that fit snugly. You may need to try out a few different hand saws until the best size saw kerf is found. I cut the kerf all the way through the handle blank but stopped when I got deep enough to hold the blade (about 1 1/2"). The space for the small tab on the end of the blade can be cut with a small chisel or a knife. The thin blade of a utility knife worked well for me to cut this housing. I think that the tab will add support to the blade while sawing, but if it's too much trouble for you to fit the tab, it could be ground off the blade completely. |
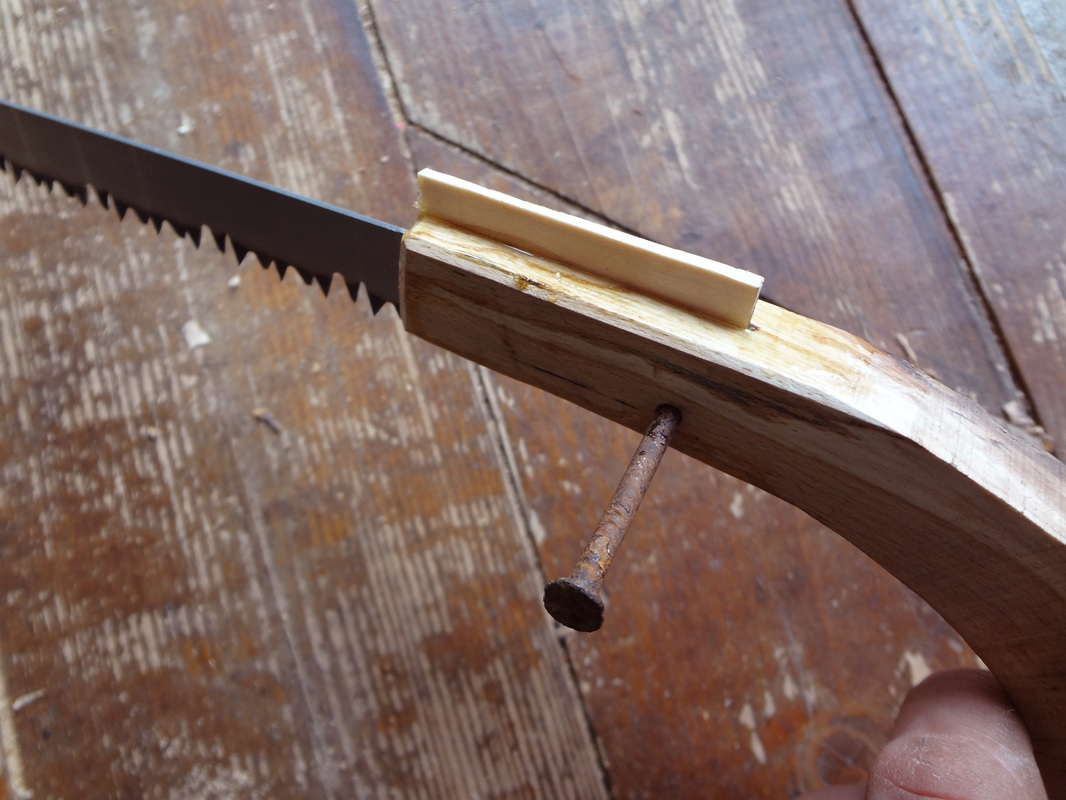
Now that the slot is cut and the hole is drilled, I tested the fit of the blade and made slight adjustments to fine-tune the it. I also checked the alignment of the hole.
I then cut a piece of wood to fill the kerf above the blade. I dry fit this piece first, then used West System's
G-Flex epoxy on all the surfaces and put the parts together.
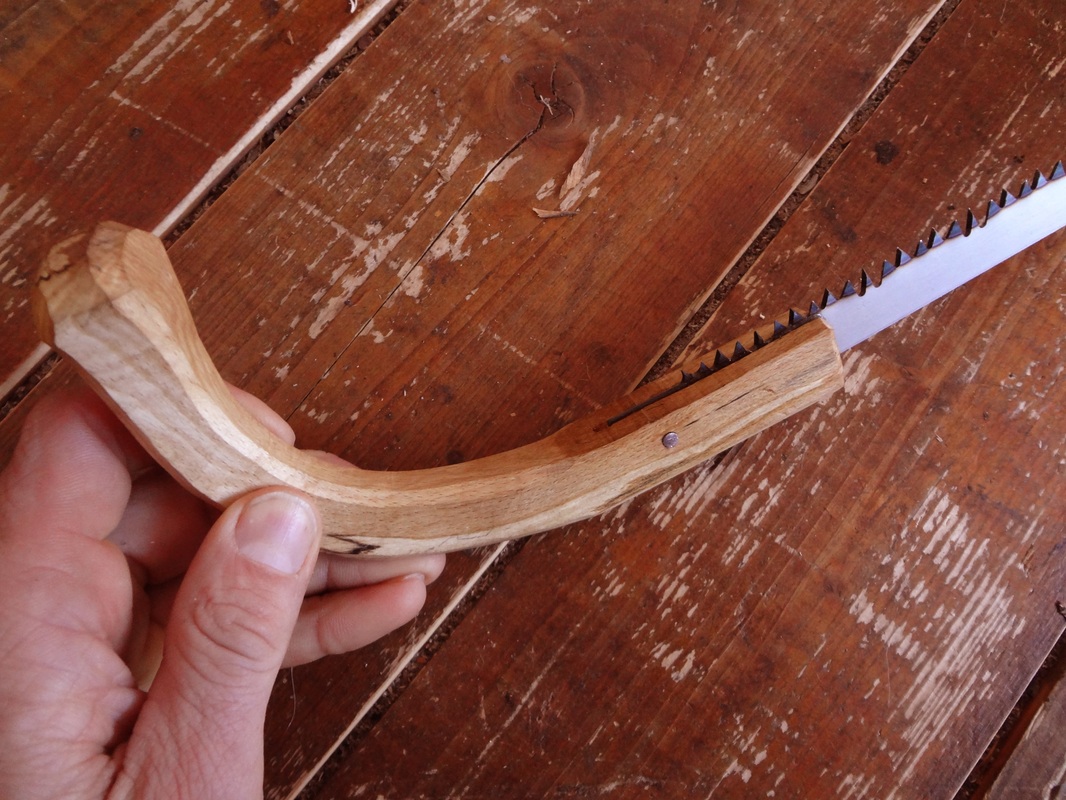
I left the nail proud on both sides, enough to allow me to use a hack-saw to get them off later.
When the epoxy had set I trimmed the filler piece of wood and then hack-sawed the ends of the nail off.
I used a file to smooth off the ends of the nail, flush with the sides of the handle.
If you haven't already done so, this is a good time to sand or carve the handle blank to your liking.
In these photos I have used a curved piece of wood for the handle, after having used it a bit I believe that a less dramatic curve would work even better.
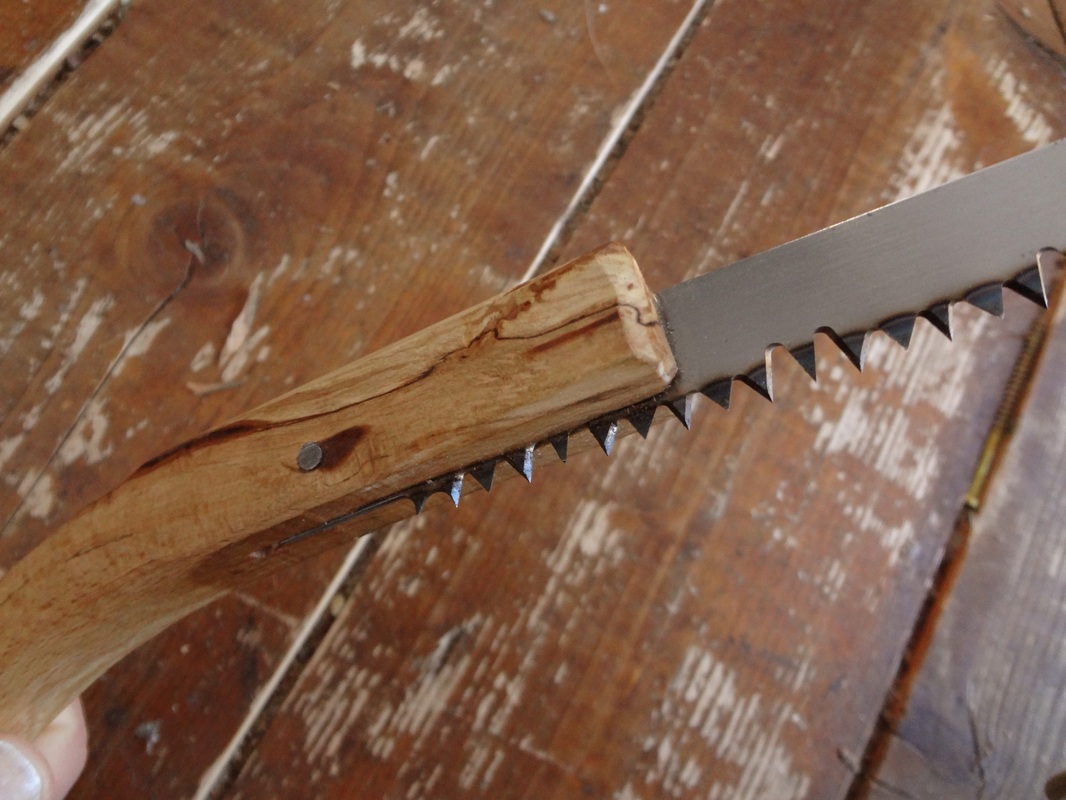
I put tung oil on as a finish for the wooden handle.
I usually don't bother to cut the saw teeth on the bottom of the handle, but my son once used my saw and cut his finger on those saw teeth, so perhaps I should. This could easily be done with a bench grinder if you wanted.
The only thing left is a simple sheath and then you're ready to go harvest your spoon wood.
If you have never pruned a tree before, please research the process so that it causes the least damage to the tree.
If your saw becomes dull, it is not possible to resharpen these blades.
You could try heating up the handle and blade in order to soften the epoxy enough that the nail could be pushed out and the blade wrenched out of the kerf.
I would probably just make a whole new saw and handle, but if you're really fond of your handle, hide glue would be another possibility as you can use alcohol or heat to soften it and get the blade out.
I have been thinking of how to make a saw with an easily replaceable blade, but I haven't done it yet.
Stay tuned!
I then cut a piece of wood to fill the kerf above the blade. I dry fit this piece first, then used West System's
G-Flex epoxy on all the surfaces and put the parts together.
I left the nail proud on both sides, enough to allow me to use a hack-saw to get them off later.
When the epoxy had set I trimmed the filler piece of wood and then hack-sawed the ends of the nail off.
I used a file to smooth off the ends of the nail, flush with the sides of the handle.
If you haven't already done so, this is a good time to sand or carve the handle blank to your liking.
In these photos I have used a curved piece of wood for the handle, after having used it a bit I believe that a less dramatic curve would work even better.
I put tung oil on as a finish for the wooden handle.
I usually don't bother to cut the saw teeth on the bottom of the handle, but my son once used my saw and cut his finger on those saw teeth, so perhaps I should. This could easily be done with a bench grinder if you wanted.
The only thing left is a simple sheath and then you're ready to go harvest your spoon wood.
If you have never pruned a tree before, please research the process so that it causes the least damage to the tree.
If your saw becomes dull, it is not possible to resharpen these blades.
You could try heating up the handle and blade in order to soften the epoxy enough that the nail could be pushed out and the blade wrenched out of the kerf.
I would probably just make a whole new saw and handle, but if you're really fond of your handle, hide glue would be another possibility as you can use alcohol or heat to soften it and get the blade out.
I have been thinking of how to make a saw with an easily replaceable blade, but I haven't done it yet.
Stay tuned!

 RSS Feed
